| So early on we decided on a custom built shower, as opposed to a prefab fiberglass shell. This allows you to use ceramic tiles inside the shower, which looks great, but is also a bit harder to do. To guide me in this whole thing I found some great online tutorials at the John Bridge Tile forum “Liberry”. Definitely worth a look if you happen to be building a shower! |
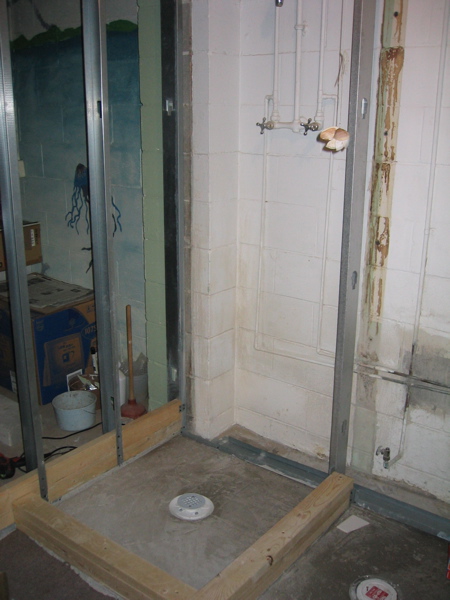 |
| We also had Dog the plumber run new piping to the bathroom instead of using the old stuff that was there. We could probably have used some of the existing stuff but would have had to run some new lines anyway. Now its all nice and shiny, well not really since its all modern plastic piping. Looks pretty easy to do being all flexible and not requiring any gas-torch welding. |
 |
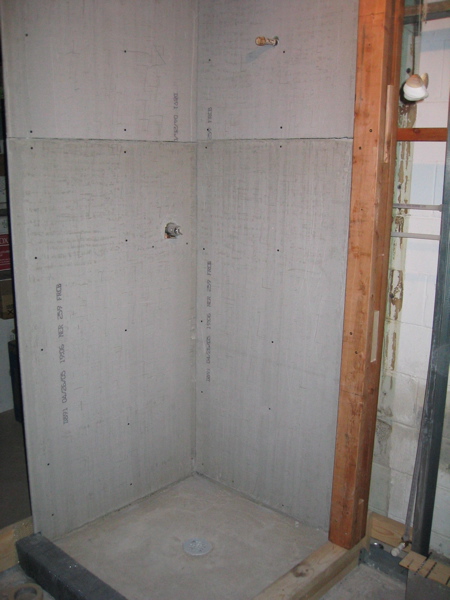
| When completed the base has many layers. First a reinforced concrete base which establishes the slope towards the drain in the center. Next a PVC liner to waterproof the base and direct seepage towards the center. This is topped by another layer of reinforced concrete. The base is now ready for ceramic tiles. |
 |
| With the base in place it’s time to put up some walls. I’m using cement board since it is the most water resistant (and this being a shower….) It’s really heavy though but fortunately it comes in smaller sheets than regular wall board. You can see the cutouts for the shower handle and head. The original plan was to put both on the inside wall, but apparently there is some code against putting the handle on a wall you cannot access from the other side, so off to the side wall it went. I think it works ok, although I wonder if it couldn’t have been a little further out from the corner. |
 |
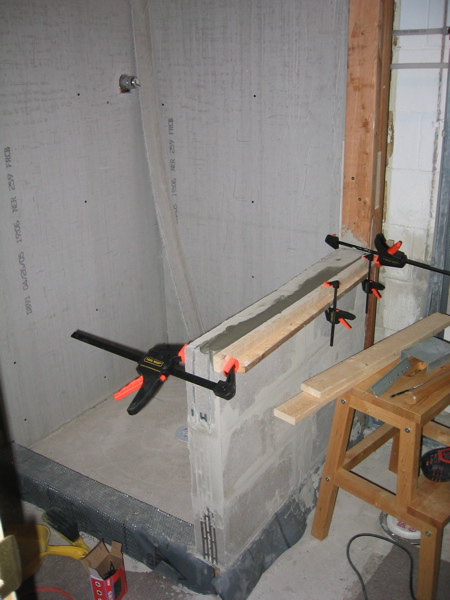
| For the other wall we are putting up a glass block wall. I am doing the lower third in brick, covered by ceramic tile. Here I am leveling the top to prepare for the glass blocks |
 |